How To Build a Smart Online Learning Management System?

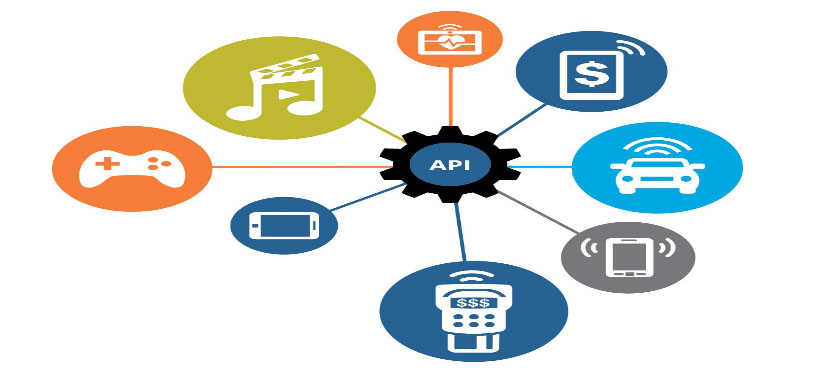
The popularity of e-learning platforms has been increasing in recent years. The conventional method of learning is no longer effective in this technologically advanced era. It’s high time to embrace cutting-edge technologies and build an advanced training program. It might be for training centers, educational institutions, government or non-government organizations, etc. Almost every other industry-specific company today is using the latest technologies to create a potential Learning Management System (LMS). And education isn’t immune to this trend.

In a study conducted by Coursera, it was discovered that online courses provide more practical knowledge and better subject-specific skills than traditional education. This has prompted recruiters to take online certificates more seriously, which has boosted the credibility of online programs.

MARKET ANALYSIS

The e-learning industry is continuing to grow at a steady rate, with about 10% growth each year and annual revenue of more than $50 billion. Without a doubt, businesses are interested in using online learning platforms for both internal training and financial gain. Let’s have a look at the latest trends in the e-learning market:

  • As per the MarketsandMarkets report, over the last 3 years, the e-learning industry has witnessed a steady growth of 5%. It also said that the global market of the e-learning industry would increase to almost $15.72 billion by 2021. The global market value of it by 2023 would reach almost $22.4 billion.
  • The Docebo report anticipated that the mobile learning market will raise over $38 billion by 2020.
  • There’s another report by Zion Market Research which is based on a 5-year prediction. It featured that by 2022, the LMS market would grow around 19.05 billion with a 24% CAGR.
  • According to a Tech Pro Research report, 74% of business employees who are already using LMS, enjoy the benefits of the BYOD policy. It allows them to learn in their comfort zone from their own devices.
  • As per a report by Forbes, many of organizations in 2018 invested a vast amount of money into learning and development. The major goal was to fill up the skill gaps besides reaching full capacity.
  • Another interesting fact is being highlighted by the Learning House and Aslanian Market Research report according to which about 60% of college students prefer online learning over on-ground learning.

There’s no wonder why investing in the development of the LMS is getting so popular these days. Want to know how to build an impressive learning management system? We have got you covered everything here but before diving into that let’s first understand what LMS actually is and how is it important?

LMS AND ITS IMPORTANCE

Learning Management System

In a nutshell, an LMS (Learning Management System) is a website that hosts e-learning programs and gives students/staff the option to participate in online training. An LMS allows you to manage all aspects of course administration, reporting, monitoring, and delivery.

Online learning has a number of significant benefits. Some of those are discussed below.

  • Higher Reach

In comparison to living classes where one is bound to available hours, online classes can reach a number of people at the same time.

  • Better Communication

E-learning builds an open connection between users and your brand.

  • Cost-Efficient

With the Learning Management System, one can cut several costs like travel, training venue, printed materials, and lector payments.

  • Recurring Income

Online courses provide one with a recurring income. One can develop their online courses and sell them without putting time aside so as to host them in front of an audience or live.

User Features

In this section, we’ll set out roles that give users access to platform capabilities and functions. There are three distinct user levels in the Learning Management System – Mentee, Mentor, and Administrator. Let’s have a closer look at each:

Mentees consist of most users in courses having basic permissions in the LMS, are able to view training material, and are unable to manage the functionality.

Mentors can craft courses, mark attendance, view course reports, manage course layout, view enrollments, upload and manage training material.

The administrator can manage every aspect of the platform. They will have visibility to all features, apps, and settings.

Mentee Dashboard

In order to login into the LMS as a Mentee, one needs to select a Mentee account type, and enter their username and password into the login form. One can also sign in with Google.

After signing in, one can view a list of available courses and select the ones one wish to join.

  • Conferences, Discussions, and Webinars

It’s a wonderful idea to offer insights on issues covered previously. As a result, facilitating discussions may assist mentees to learn from one another and better comprehending and retaining the information. The discussion function allows mentees to ask questions, engage in conversation, add depth to the course they are taking and leave comments. They have the option either of beginning the conversion or reflecting on course material in order for participants to grow.

Mentees can also go to Web conferences and Webinars. Webinars are those that are divided into sessions and may be attended remotely via videoconferencing. To attend these webinars, mentees must log in directly to their account so that their progress may be tracked. Best practices or how-to videos are used in webinars. Mentees may give immediate feedback by asking questions, providing comments in real-time, and watching best practices being demonstrated live via real-time comments.

  • A Chatbot – Virtual Personal Assistant

Having a virtual personal assistant at each step of the learning path helps to interact with the mentee just like a real person via messaging, engages the mentee in realistic conversations, and helps them to complete the course step-wise and perform the tasks in a better way. It also helps the mentors by reducing the burden when explaining the same things over and over again to different learners and to answering the questions being raised on a regular basis, checking their homework, assigning projects, identifying grammatical mistakes and spelling precisely, and keeping a track of the progress and achievements of mentees. The learning process becomes more personalized, adaptive, and productive with the chatbot.

  • Virtual Online Consultation

Online consultations, on the other hand, are quite effective in assisting mentees with difficulties they may encounter while learning. Thanks to technology, mentees now have alternative methods of contacting their mentors and obtaining answers. An online consultation aids mentees in getting a quicker reply as well as boosting their engagement and confidence in accomplishing tasks.

  • Calendar

Dates of webinars, assignments, conferences, tests, and events fly around constantly. So, whether it is for personal or academic reasons, calendars provide many benefits to us. Embedding Calendar into the LMS system enables mentees to schedule time for important activities such as tests, webinars, conferences, etc. thus enabling them to complete those that have deadlines or are a priority.

  • Progress

The right reporting has a major impact on an organization, significantly changing the way mentees perform their tasks. Are the mentees actually completing the online training activities and modules? How many courses did they complete? Are mentees progressing as per the plan? These are all questions that can be answered by reports extracted from the created LMS.

Mentor Dashboard

In order to login into the LMS as a Mentor, one needs to select a Mentor account type, and enter their username and password into the login form. One can also sign in with Google.

In the LMS, the mentor can manage the course content via a single page. Mentors have the ability to upload the training materials, edit content, provide social tools and forums, enable all features necessary for the course, and share links.

In terms of the Course Content, a mentor can do the following:

  • Add Content: A mentor can upload materials allowing mentees to upload and download these materials.
  • Reorder Content: A mentor is entitled to edit the course program that updates on the roadmap automatically and notifies mentees as well.
  • Edit Course Info: A mentor is entitled to edit the course information.
  • View as a Mentee: A mentor can view content as a Mentee.
  • Add Event: A mentor can add a conference, or webinar or can also schedule a virtual online conference for mentees assigned to the specific course.
  • Share: A mentor can share a link with mentees assigned to the specific course.
  • Mobile App Compatibility: A site can be viewed as well as used on a mobile device.

In terms of the Course Rules, a mentor can do the following:

  • All units must be completed
  • Certain units must be completed
  • A percentage of units must be completed
  • Test passed

A mentor can manage files – add training materials for the mentees such as texts, lectures, videos, and images – and manage them.

A mentor can see all of the mentees who are enrolled in the courses she/he is teaching. A mentor must access the user’s page, which displays a list of all of the mentees who are taking the particular course. The account status, account type, name, email address, and activities for each mentee will be shown.

Administrator Dashboard

In order to login into the LMS as an Administrator, one needs to select an administrator account type, and enter their username and password into the login form. One can also sign in with Google.

With the help of various tools that are available in the platform, an Administrator can manage, organize, monitor, and report all of the course activities. After login, one can view the Administrator home page consisting of the following:

  • Courses
  • Users
  • User Types
  • Groups
  • Categories
  • Reports
  • Import/Export
  • Notifications
  • Events
  • Settings

Let’s discuss the most interesting feature – Reports. In the LMS, an administrator can easily and quickly check course progress as well as statistics by accessing and managing reports. Following are the Reports:

  • Course reports
  • User reports
  • Branch reports
  • Group reports
  • Test reports
  • Survey reports

Once selecting the User Reports tab, one can view a list of all the users who are enrolled in the system. If you click on the username present in the user’s row, you will be redirected to the course summary.

On selecting the user (mentee), you will be able to see a number of statistics at the top of the page:

  • Active Users
  • Logged in Users
  • Assigned Courses
  • Completed Courses

You can also see Course, Certification as well as Timeline Statistics showcasing a graph and a timeline for the user’s course access.

TOP 3 E-LEARNING PLATFORMS TO CREATE AN LMS

The most popular types of LMS software are Proprietary, Partly Free, and Open Source. Blackboard, Canvas, and Open edX are the most popular representatives of each type, respectively. Let’s look at the three forms in detail:

A proprietary LMS platform, Blackboard has been on the market since 1999.  It is distributed under a license and one can use the features and modules that are provided out of the box. Contrarily, this LMS has the most reliable and stable paid technical support, vast and well-organized documentation, and has proven to be a good choice for small-to-medium businesses.

On the contrary, Blackboard needs a lot of supplementary software to offer complete functionality, thus leading to high monthly expenses. Customization options here are also quite limited.

Blackboard may be suitable for organizations having stable business practices, can afford monthly subscriptions and doesn’t require deep customization or frequent changes.

By infrastructure, Canvas is an LMS with features that one will actually use. Their point is that a number of LMS offer many features that users are not even aware of. On the other hand, Canvas offers an intuitively understandable and simple set of features and functions, only the ones that the user will absolutely require. This supposedly will enhance the overall user experience and the adoption rates.

Although, the lack of specific functionality and the cost of deep customization often leads to authors and students dropping Canvas for a good reason.

Open edX is a free open-source LMS developed on Python and has been structured around the xBlock ideology. Courses are created from xBlocks that are small individual sections, each of which contains an entire unit of information. These could be combined in any sequence with each other. Open edX Studio is a powerful course creator, which contains all the xBlocks which are available presently, which enables one to compromise and deploy new courses in a few hours.

The main issue with Open edX happens to be the technical issues that appear constantly while installing and managing the software. Probably because of this reason, the potential behind Open edX has yet not been realized completely.

Though, Open edX can prove to be the most easily customizable solution, which can suit all your requirements after proper adjustment.

The Future of LMS

The Learning Management System started in the consumer market and continues to expand into the business world.

Below are the two major trends that will have an impact on the future of Learning Management Systems:

    1. SCORM Certified

Any Learning Management System that is SCORM (Sharable Content Content Object Reference Model) certified can exchange the same lesson content. Thus, any time lessons are developed, they can be shared across platforms instead of duplicating and recording for a new system.

Having a SCORM-certified LMS allows you to use third-party modules within your system, as well as distribute your own authored courses to other systems. Although purchasing a certified provider may not be required for your company, certification will influence the decision when it comes time to make one.

  1. Mobility and Gamification

Mobility and gamification features go together as new solutions have been designed to be accessible and interactive.

Employees are increasingly making use of mobile devices for work, thus leading businesses and vendors to meet the demand for a high-tech workplace. According to a survey, out of 350 businesses, 60% wished for a new LMS for meeting advanced needs like mobility.

As vendors craft LMS solutions to provide the best experience to learners, gamification is a significant focus to use social learning techniques. When employees interact via social features, administrators can easily track their performance.

Choosing Project Development Techstack

Develop an LMS

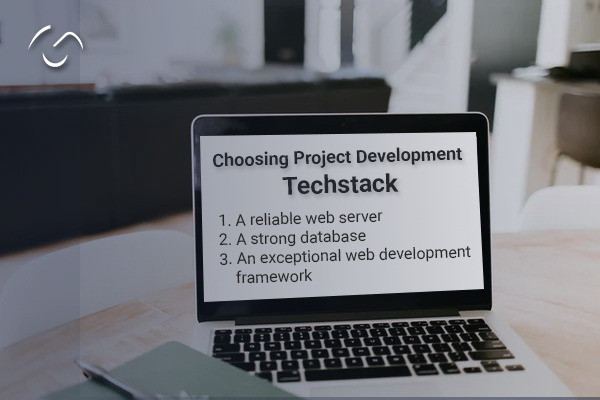
Choosing the appropriate tech stack for project development is the most important step. In order to develop an LMS, you will need the following:

  • A reliable web server
  • A strong database
  • An exceptional web development framework, etc.

For each one of these, you have a number of choices available today in the market.

We have extensive experience with a variety of technologies, including Laravel, Python, Ruby, MongoDB, PHP, MySQL, AngularJS, HTML, CSS, and ReactJS. With your desired technology stack in mind, our experts can help you build the LMS from the ground up.

If you’re unsure about the technology stack that would be ideal for your project, just tell us about your requirements and we’ll be glad to provide you with the best possible solution within your budget and time limits to make the development process easier as well as faster.

Bottomline

Do you want to build a new-age learning management system, too? Don’t worry, we’ve got you covered. Our team has years of experience and real technical understanding to provide market-leading solutions for developing intelligent LMS. Get in touch with our specialists right away and take your concept to the next level.
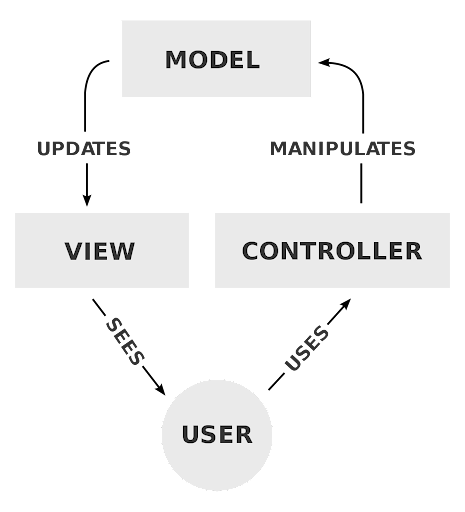
A Look-back Into the Year Gone By- OnGraph Was On A Roller-Coaster Ride!

OnGraph Technologies
2018 was a revival year for us. When the year opened, who knew what it carried for us in its magical box?

As we stand in 2019, it feels like a roller-coaster ride when we look back at the 365-day journey of the year 2018. Not only OnGraphers but also our clients found their favorite moments from the previous year. They are proud to be a part of this incredible journey. We passed several challenges throughout the year that demonstrated our strength of forwarding thinking and the winning strategy across multiple engines of OnGraph Technologies.

The number of milestones we achieved in the last year is encouraging and sets for us a base to further build our success story in the upcoming years. The successes and achievements reaffirm our unabating commitment to quality, customer satisfaction, technology, and philanthropy.

Our growth was fueled by our diversified Portfolios. Throughout the year we were very busy, but we are delighted.

Here, we invite you to have a peep into this brief account of our last year’s highlights and successes. Don’t be surprised to see us adroitly gaining an edge across all aspects of our business, in 2018. We have planned a double for 2019!

1. Our Decade In The Industry

Decade In The Industry

Last year, we marked “a decade of excellence” in the area of mobile and Web Application development and innovation. This very first milestone of the year is a testimony to our persistent effort towards innovation, our deeply rooted core values, and our challenger spirit.

We also welcomed us to a new decade with loads of wishes and offered us a grand celebration organized in the city of Agra – home of the iconic Taj Mahal. Both of our development centers, based out of Noida and Jaipur, united to make the occasion enthralling with their dancing, acting, and singing. We partied hard, distributed awards, took selfies, laughed hard, and revived our commitment as a family to continue pushing our boundaries and leading the game.

2. Key Achievements & Milestones

We do understand that the choices we make will have an impact far beyond our business. We made such choices, and it paid us back very well. Our business footprint reached to 20+ nations. US, Canada, Western EU (UK, Sweden, Spain, Belgium, France, Italy), Australia, New Zealand, Malaysia, and the Middle East are a few among them.

Key Achievements & Milestones

Clearly, as we told you earlier, we were really busy throughout the year.

3. Recognitions & Accolades


Recognitions & Accolades

The year grants us other proud moments. World’s top B2B Reviews and Rating websites AppFurtura recognized us as a leading Web and Mobile app developer among World’s top 20 companies. On the other hand, “Clutch” – World’s leading B2B market research organization – featured us among “Global Leaders for 2018”.


Recognitions & Accolades

We were also exhibited and interviewed at MWC and TechXLR8 for our thought-provoking development ideas and innovations.

4. New Business Horizons


New Business Horizons

We kicked off the year-winning blockchain projects. As a dynamic and growing software solution provider, we learned and honed our skills, and started development services around AI-powered chatbots and RPA. We developed 8+ POC and decentralized apps for start-ups and top leading brands. As the applications deployed well, we are looking forward to sharing our exciting portfolio and Case-study in 2019!

5. CSR Activities- Giving Back To The Society


CSR Activities

While the business side of us was flourishing continually, we didn’t let the human side to be retracted inside the layers of business, business, and business. As we wear “Corporate Social Responsibility” on our sleeves; thus spread smiles on the faces of children. We supported Orphanage and invited children to our development and delivery office in Noida. We became Santa for them. It was a true bliss seeing a bundle of joy with twinkling eyes when their wishes came true. They enjoyed cakes, toffees, music, dance, and dinner with us. And, we lived our childhood once again.

For another noble cause, a blood donation camp was organized at Noida Headquarters. Moreover, on the world-environment-day, a small activity performed to show care and love for plants. We feel proud to be an active contributors to society and save lives.

6. Celebrations, Parties, Pizzas and a lot more


Celebrations

We drank 50 million cups of coffee, digested 30,000 Pizzas and burnt those extra calories in 50 + Dance Parties. We celebrated every success, birthday and anniversary. The 100+ Team Parties boast the critical milestones we reached. The multiple outings – all as a family – speak words about our knack for maintaining a work-life balance.

7. Together Enjoyed Festivals with Zeal, Fervor, and Gaiety


Festivals

We value the diversity of people and aspire to foster our heritage of respect for people, culture, thoughts, and the environment. Stressing on our founding values to operate responsibly, we organized, participated, and enjoyed 10+ festivities. Gifts distribution in Diwali to spreading colors of happiness in Holi, replenishing our stomachs with vermicelli in Eid Celebrations raising our patriotism on 15th August, participating in the decoration and spreading happiness on Christmas to Dancing on Bhangra on Lohri and Flying Kites on Makar Sankranti, OnGraph Family enjoyed all of it – together.

8. New Development Facility


Development Facility

In the year 2018, not only we added a new location on the map, and we moved to a bigger and better place. Our development center in Jaipur gave a bid to their old workplace and shifted to a new office building to give wings to thoughts, challenge every innovative technology, and foster easy collaboration with clients and among us. With a view to fulfilling the growing needs of all our stakeholders, we opened a new development center in Noida as well. We are among the leading IT companies, not only because of our advanced development and love for technology but also due to our unique approach to connecting with clients. Therefore, we opened a sales office at a prime location in London.

OnGraph is growing from strength to strength. We think the time is just right to take stock of how far we’ve come, but all would be remiss if we do not thank and appreciate the central and pivotal role played by our clients, partners, and employees in our continued business success journey.

We are proud to cultivate such great partnerships and relationships. We cannot wait to help our new and esteemed customers solve their IT challenges and address their software needs in 2019.

Top 10 Alexa Use Cases

Top 10 Alexa Use Cases

Wondering what Amazon Echo can do or whether you need one in your business? What makes this speaker more favorable than others on the market? We’re describing Amazon Alexa use cases in detail.

What’s Amazon Echo?

First originated in late 2014, Amazon Echo is a 9.25-inch hands-free wireless speaker you control with your speech. Thanks to voice command technology called “Alexa,” what’s inside Amazon Echo is now accessible on other devices, including the Amazon Fire TV and the forthcoming Amazon Echo Dot and Amazon Tap.

What’s Amazon Echo?


What Is Alexa?

Alexa runs on Amazon Web Services and requires a Wi-Fi Internet connection to work. To start a command, Alexa must listen to a “wake word.” The default word is “Alexa,” although you can modify this to “Amazon” through the free Amazon Alexa app.

With Alexa, a cooperative device can play music, answer questions, control the lights, and much more. Since its launch, Alexa has added over 100 new features and skills. The Amazon Echo took off the market in 2016 with the Echo Dot and Echo Tap joining the lineup, while Google presented credence to the market with the release of its virtual assistant speaker, the Google Home.

The competition has been immeasurable for Echo owners as Amazon has quickly improved built-in functionality and worked hard to produce additional “skills” to the platform blending with ever more 3rd party hardware and services. Alexa has grown so popular, in fact, that Asus, Acer, and HP have all stated they will be adding Alexa to their 2018 Windows laptops, offering immediate competition to Microsoft’s own AI assistant.

While there are thousands of professions available if you require something truly unique you can indeed create a skill of your own. There is no mystery that the Echo and Echo Dot have carved out a place in many homes, but are there practical applications in an office setting? From built-in features to 3rd party skills, we’ve assembled ten uses for Amazon Echo to improve your office life. In the section below we are going to explain to you the Amazon Alexa best uses.

What Is Alexa?


Top 10 Amazon Alexa Use Cases

1. Ordering Supplies

Sure on some level, you are performing into Amazon’s hands with this one, but it’s hard to contend with the comfort of realizing you are running short of pens and just saying, “Alexa, order some pens.” The Echo orders based on your past purchase history, so in less than 5 seconds you’ll be back to work, and your shipment will be on its way.

2. IFTTT

As it is so often the situation, if you are looking to get more out of service you can adapt to IFTTT. Connecting your Echo up to IFTTT allows you to unite with services that aren’t supported natively by the Echo and also enables you to consolidate multiple actions into a particular command to the Echo. You can easily create your own IFTTT recipes for the Echo, but going forward with the list of current recipes can periodically be illuminating.

3. Manage a To-do List

Removing resistance from managing your to-do list is one of the assured ways to keep you on track, and it doesn’t get much easier than using the Amazon Echo. The built-in to-do list is ideal if you just require something easy, but modern cross-platform apps offer a To-do list, Echo integration and a significantly more robust feature set. The Echo will allow you to combine tasks to your to-do lists in these services including deadlines or demand a rundown of your assignments for the day.

4. Translation

While the Echo won’t interpret the whole discussion for you in real-time still, the Translated skill will interpret a sentence from English into more than 30 languages through voice, and it can provide a typewritten translation in more than 100 languages. It won’t take the spot of knowing a language, but if you’re just attempting to make a good track with a sentence or two in someone’s native language or reaffirming how to answer something specific this will get the job done.

5. Ambient Music

Another built-in feature, but if you were acknowledging a Bluetooth speaker, a communal space, or for your private office then the Echo is worth a look as beyond all of the rest of the functionality it allows it is an excellent speaker.

6. Control Office Vacuum

Like keeping your office neat, but not interested in spending on cleaners who come in daily? Connected vacuums from Neato and Samsung enable you to deploy or stop their independent vacuums with the Echo. Particularly if you put in odd hours this is a great addition as you can just tell the vacuum to begin cleaning as you walk out the door.

7. Order a Ride

If you ever practised an on-demand car service to travel home, the Echo can book you a drive with Lyft or Uber. The app can offer you the expected cost of the ride first and then go ahead with reserving your ride. The Lyft skill notably enables you to request the lower-cost Lyft Line service whereas the Uber skill doesn’t permit you to request Uber Pool.

8. Voicebox

If your office uses HipChat the company’s VoiceMyBot integration is one of the most robust out there. Users can request a summary of the latest messages and site status updates, ping the website or service, post messages, and indeed build and expand source code all by voice.

9. Automatic

If you have operators with your business or do any driving for work yourself, an Automatic is an impressive little device that plugs into the OBD-II port of your car and both tracks and stores data regarding your driving. The Echo skill enables you to question where your car is parked, how much gas is left, and how much distance you have covered in a given period.

10. Skill Finder

With the record of Alexa skills at 25,000 and growing, there are always fresh and exciting combinations coming up that might be the ideal fit for your business, enter Skill Finder. As the title suggests, this skill will help you find probably useful skills with a skill of the day highlighted, a rundown of the top or distinct skills in a category, and more.

How to use Artificial Intelligence Markup Language (AIML) In Chatbot Development with Python?

AIML
Chatbots are the beginning of a new technological era. Businesses and developers have a new love: chatbots. Chatbots are online digital assistants that work through chatting to provide a variety of services.

If you have more time and ambition, you can build an intelligent assistance agent from the bottom up. There are plenty of chatbot scripting language frameworks to choose from when creating a simple conversational chatbot to a more sophisticated virtual customer service assistant.

Why Go With Python?

Python’s initial implementation began in 1989, and it is still in use today. Python has a lot of great features, and its developers love them. Python comes with several built-in libraries for web connections like UrlLib2/Requests, making many tasks quite simple.

Python is a simple, easy-to-read language with clean syntax and grammar. The language also provides a wide range of official as well as unauthorized APIs via GitHub to speed up your development. Python is an excellent language for building chatbots since it has evolved over time and now includes all modern techniques and imaginations. Chatbot Developers can use Python as it is a highly tested, well-tested programming language that allows users to customize modules in various ways.

Some of the Significant Features of Python are as Follows:

Features of Python

Features of Python

  • The Holistic Language Design
  • Thought Out Syntax
  • Language Interoperability
  • Balance Of High-Level And Low-Level Programming
  • Documentation Generation System
  • Modular Programming
  • Correct Data Structures
  • Numerous Libraries
  • Testing Frameworks

An Introduction to AIML

Artificial Intelligence Markup Language

AIML

ALICE AI Foundation’s AIML (Artificial Intelligence Markup Language) is the invention of Dr. Richard Wallace and is offered as an open-source chatbot script framework by ALICE AI Foundation. AIML is a simple XML or HTML-like language that uses standard and extensible tags to identify text for interpretation by an AIML interpreter.

Artificial Intelligence is required to interact with a bot through a content interface in such a way that it resembles human conversation. The AIML syntax, like XML, characterizes rules for connecting patterns and determining responses.

Below is a step-by-step guide to using AIML in chatbot development with Python.

1. Create a Python-based Startup File and Load AIML b

The primary entry point for loading AIML files is the creation of a standard startup file called std-startup.xml. In order to do so, you must build a basic record that matches one pattern and performs only one action.

In a nutshell, you must fit the pattern load AIML b with your AIML brain. It enables you to produce the basic_chat.aiml file in a matter of minutes.

2. Make Your Own AIML File

You’ve created an AIML file that handles one pattern, and you’ve loaded it with the b command. If you send the command to the bot, it will try to load basic_chat.aiml. However, unless you create it yourself, it won’t work. This is where basic_chat.aiml may be placed.. This enables you to link two simple patterns and replies together.

3. Use Existing AIML Files

You may write your own AIML files, but it will take you a long time. It might take 10,000 patterns before you feel natural. The ALICE foundation, on the other hand, provides a variety of free AIML files. You can find AIML files at the ALICE Bot website.

There was a previous variant called std-65-percent.xml that had the most frequent 65% of words. There’s also another one where you can play BlackJack with the bot using it.

4. Implementing Python

To date, everything has been AIML XML documents. All of this information is crucial and will influence the bot’s decision, but it is simply data right now. The program must be awakened. Python may be used to execute the AIML syntax in any language; however, some developers have done it particularly well.

Install the aiml package with pip.

Note:- the aiml package only works with Python 2. Py3kAiml on GitHub is a Python 3 alternative.

5. The Simplest Python Program

This is the simplest program to get started with. It creates the aiml object that may learn the startup file and then loads the rest of the aiml files. From that point on, it’s ready to converse, and you can input any amount of messages that will be prompted for by the client. You should provide an example for which the bot can detect a pattern. The AIML data you loaded influences how your patterns are recognized.

You may make the startup document a separate element so you can add more aiml files to the bot later without changing any of the project’s source code. Simply adding additional facts to be learned in the first xml documentation is all it takes.

6. Reloading AIML While the Bot’s Running

When the bot is turned on, you may send the load message to it and have it reload the AIML files. Keep in mind that reloading the brain on the fly will not preserve any of the new changes if you utilize the brain technique. You’ll either need to delete the brain file so it can be rebuilt on next startup, or modify your code so that it saves the brain at some point after reloading.

7. Adding Python Commands

In the case that you need to give your bot unique instructions that utilize Python scripts, you should first receive and process the information message before sending it to kernel.respond(). You may get your contribution from anywhere. Perhaps a TCP attachment or a voice-to-text source. Process the message before it reaches AIML. On certain communications, you may need to keep a safe distance from AIML processing.

8. About Sessions and Predicates

The AIML can manage distinct conversations with various individuals by indicating a session. For example, if one person tells the bot their name is Alice, and another person tells the bot their name is Bob, the bot may distinguish them. To figure out which session you’re using, pass it as a second argument to react().

This is good for having customized discussions with each customer. Somehow, you should establish your own session ID and keep track of it. It’s worth noting that saving the brain files does not store all of the session values.

Bottomline

We hope that we have been able to add value to your understanding of chatbot development with AIML and Python. Have you thought about how you might integrate this information into the next project or task at work? If not, take a moment right now and think about what could be improved by using these tools. 

Need expert advice? Connect with our team of specialists now!

SOAP Vs REST, Which API is More Secure?

SOAP Vs REST
In a digital world, secure data exchange requires safe web applications and API security. The balance you move from your bank’s mobile app, the OTP you provide to you for retail transactions, the credential you hold and apply to numerous devices from various locations in order to access your online accounts—all of these things are possible due to an API and hence your API must be safe.

API Security

API Security
API Security

There are standards in place to protect the API, and these must be implemented during information transfers as well as when data is stored. But where are the standards for the surface area that APIs represent? You want your data to be accessible, but not the sensitive stuff, never to anybody. The front-line defense layer of an API is also known as its “guardian” function, and it has to be viewed as a major concern and specificity just like any other security risk.

In today’s world, there are two primary Web Service Formats. SOAP and REST are the most popular ones, with SOAP being widely adopted in organizations with high-end security as an API. However, because of its distinct format and semantics, the modern REST pattern is surpassing SOAP in terms of web services development. Both standards expose data using HTTP requests and responses, but they use various formats and meanings to accomplish it, resulting in different behaviors for security issues that you must be aware of.

The use of SOAP’s extensibility, which includes extensions for transnational messaging dealing with particular security issues, has revolutionized the way businesses communicate. SOAP has been around for a long time and is widely used in large enterprises. XML-Encryption, SAML token, and XML-Signature are just a few of the security technologies that have clamped down on data being received by and transmitted from a SOAP service.

On the other side, although REST does not include as many security patterns as SOAP, it nevertheless leaves security up to the application. Instead of assuming that something comes out of the box with REST, it is critical to focus on the amount of safety in code, deployment, and transmission.

SOAP Vs REST

1. Standardization and Security:

 SOAP is a better choice for standardizing and securing Web Services when you want to meet the following goals: When it comes to standardization and security, SOAP is generally regarded as a superior option for using Web Services. Both API formats offer a Secure Sockets Layer, which encrypts data during transit. However, so does WS-Security, which is a bonus for businesses.

2. Compatibility:

REST and SOAP are two API protocols that work with a variety of data output types such as JSON, CSV, and XML. SOAP is restricted to XML, while REST may handle any data format. The use of REST for data transfer in JSON saves money on computer infrastructure expenses since the JSON format is easier to parse than XML.

3. Processing of Query:

Rest is more sophisticated, therefore when another endpoint requests an already completed query, the API development may take advantage of the data from the previous request. On the other hand, SOAP solutions must repeat the process for each query.

SOAP is the greatest option for projects with critical private information such as finances, banking, and others. You do not need to use SOAP while developing a mobile application that sends the day’s forecast because you don’t require additional security in this case.

What can we infer from the above comparison?

While it appears that SOAP has an overall advantage over REST, using a badly-designed SOAP API may be far more detrimental to an organization. The WS-ReliableMessaging standard provides built-in error handling for message failures via the SOAP protocol. In contrast, when a transfer fails in the middle, as with many other protocols, it must be resent.

API Testing for Security and Stability

API Testing Security

APIs ensure that data is delivered on a regular basis while also assuring that users have the most up-to-date version of a code base. However, this also raises the risk of software failure or lax security. As a result, API testing is crucial for building a solid user base and ecosystem.

API testing differs from website or application testing in that it isn’t as reliant on the processing servers and systems that handle the heavy lifting. The core of API testing isn’t limited to the processing servers and systems that tackle huge tasks. Data storage, request processing, programming, and other factors can lead to incorrect response formatting, which the software would be unable to utilize.

When it comes to testing APIs, developers check to see whether the systems can handle all of the concurrent users who will be using them at once. Bottlenecks in the API might cause the service to function slowly, with unanticipated consequences for application performance, website speed, and client happiness. These issues can get worse when it’s impossible to tell which API endpoint is having problems.

Developers perform stress tests on APIs to ensure that they can support the anticipated number of simultaneous users. Bottlenecks in the API might cause it to respond slowly, and this may have a negative impact on service performance, website speed, and customer satisfaction. When it’s unclear which API endpoint is having issues, these problems get much worse.

Bottomline

You want your consumers to have an easy, seamless app user experience across all internet platforms. This is only possible if you pay attention to API security and the platform on which it can successfully handle all of the concurrent users attempting to access services at the same time. Any kind of API blockage might result in difficulties including sluggish response, sub-par performance, or incorrect results. When it’s uncertain which API endpoint is having issues, these problems can get worse.

Looking for expert advice? Get in touch with our team of specialists!

What is MVC Architecture in a Web-Based Application?

MVC Architecture

What is MVC Architecture in a Web-Based Application?

We can simplify MVC Architecture into Model-View-Controller, which is a well-known phrase in the world of software engineering and web application development. It’s a word or pattern used in web development to break down three primary aspects of any application into separate environments. This was originally designed for desktop computing but has been widely adopted by all programming languages as an architecture for World Wide Web applications. Internal information representations were completely altered by MVC. The way information is presented to or received from the user has changed forever.

The MVC Architecture has become the most popular and effective framework for web applications, websites, web services, and interactive web apps since it improves the development process of these online projects. It may be used with PHP, JAVA, ASP.NET, and many other programming languages to customize World Wide Web applications.

The Controller, the View, and the Model are three components of MVC that accomplish everything in an application. They include:

1. Model

The model is in charge of obtaining and manipulating the data, making it the application’s brain. It frequently communicates with a database of some sort. This might be a relational database like MySQL or a NoSQL database such as MongoDB. It matters little; in many frameworks, the model code may remain identical across different databases supported.

It’s just the database driver that has to be updated, and it doesn’t have to operate with a real database. It might be anything as basic as a file. So you can easily interact with a JSON file and get data from it using your model.

It’s the component that performs queries like select, insert, update, and delete, as well as interacting with the controller. In most cases, the controller may ask for data from the model and modify the view; however, in some frameworks, the model may actually change the view directly. 

2. View

A view, as the name implies, is a website that displays data from the controller. The controller talks to the view as well as the model since it contains dynamic values. The template engine in each framework may vary, depending on which one you pick.

The template engine provides functionality for dynamic data. We can’t output variables, use logic, make an if statement, or perform other tasks in a static HTML document, but we can do so with templates thanks to the template engine.

3. Controller

The controller receives user input, so it may be from a user going to a page or clicking a link that makes a get request, or submitting a form that makes a post request, and we also have to delete requests and update requests for changes. And these can’t be done directly from the browser; you can only do a get or post but there are HTTP clients that are sometimes built-in with the framework that can perform this.

The controller now serves as a link between the model and view. The controller will request data from the model and then pass that information to a view, where it will be loaded. Then, in the template engine’s place, logic can be implemented.

Let’s understand this process with an example;

MVC ArchitectureMVC-Architecture

The user now has a view of the application in their browser, and the program can issue requests to a router with input. Their request might be a link that they clicked on or a route.

The router will call a particular controller method depending on the route and whether data is required or if you need to get information, at which point the controller will connect with the model. After that, once the controller has obtained that data, it can load a view and send it the data, which will be handled by the template engine.

That’s all there is to it! When everything is ready, the application will send the view back to the browser for the user to see.

Bottomline

The separation of concerns ensures that the programmer may quickly identify and solve application-specific issues. Because MVC is decentralized, it’s easier to manage the complexity of big apps. It allows developers to focus on one aspect of execution at a time. MVC architecture is also adaptable, allowing for fast and parallel development that minimizes downtime while maintaining high standards of quality for the application.

The MVC framework’s higher productivity and maintainable code make it a popular web application development tool.

How to setup Codeigniter

How to setup Codeigniter

In this blog, we have laid down a step-by-step guide to download and install Codeigniter. The tutorial will help you setup Codeigniter. 

Before jumping into it, let’s revisit a few basics about the MVC Architecture

The Model represents your data structures.

The View is the information that is being presented to a user.

The Controller serves as an intermediary between the Model, the View, and any other resources needed to process the HTTP request and generate a web page.

Now, let’s get started.

CodeIgniter installation steps:

CodeIgniter installation steps

CodeIgniter ins

tallation steps

  • Step 1 Download Codeigniter from “https://www.codeigniter.com/download
  • Step 2 Unzip the package.
  • Step 3 Upload the CodeIgniter folders and files to your server.
  • Step 4 Open the application/config/config.php file with a text editor and set your base Step. If you intend to use encryption or sessions, set your encryption key Like : “$config[‘encryption_key’] = ‘A41H0LLJG3bc83M0Rl87CfOA3xn3zSKY’”
  • Step 5 if you want to use the database then open the application/config/database.php file with a text editor and set your database settings.
  • Step 6 If you want to use libraries then open the application/config/autoload.php file with a text editor and set libraries like :
  • Step 7 “$autoload[‘libraries’] = array(‘database’,’session’,’form_validation’);”
  • Step 8 if you want to remove index.php from the base URL then just create a .htaccess file into your project folder and paste code below:


  • RewriteEngine on
  • RewriteCond $1 !^(index\.php|resources|robots\.txt)
  • RewriteCond %{REQUEST_FILENAME} !-f
  • RewriteCond %{REQUEST_FILENAME} !-d
  • RewriteRule ^(.*)$ index.php/$1 [L,QSA]
  • And You should remove index.php from you config file under \application\config in :-
  • $config[‘index_page’] = ”;

That’s all there is to it. You’re good to go!

If you have any queries please schedule a meeting according to your convenience.

How to Print Each Row of Table on Separate Page in Jasper Studio

How to Print Each Row of Table on Separate Page in Jasper Studio

How to Print Each Row of Table on Separate Page in Jasper Studio

One of the most asked but least answered questions is how to print each row of a table on a separate page in Jasper Studio. Well, we have a step-by-step guide down below to answer your question.

Create a report Like separate.jrxml

To do that:

1. Click on file -> New -> Jasper Report

New Report wizards window open

2. Select Template Blank A4 and click on next.

New Report wizards report file window opens.

3.  Select the folder in the workspace where you want to put the report, and name the report Like Separate.jrxml and click on the next button.

New Report wizards  Data source  window open.

4. Select data adapter Like: “Sample DB” and write query Like “Select * from address”;

New Report wizards’ Fields window opens.

5. After selecting fields click on next button

6. Click on the Finish button.

Note: After creating the Main Report, disable all bands except the Summary Band.

Create a table in a report

To create a table in a report:

1. Select the table element from the palette and drag it to the summary band. Dataset wizard open:

2. Select dataset name Like “dataset1” and select radio button “create a new dataset from a connection or data source” and click on next button.

3. Data source window open. Select data adapter “sample DB” and put the query like “select * from address” and click on the next button

4. The window opens. Select the fields which you want to show in the dataset and click on the next button.

5. Group by the window: Select fields which you want to use in a group and click on the next button.

6. Connection window opens: select option “use same connection used to fill the master report” and click on next button.

7. Table columns window open: Select fields which you want to use in the table and click on the finish button. Tables are generated in the summary band.

Connectivity to print each row on a separate page:

Print Rows in Jasper Studio


1. Click on dataset1 from the outline which is created for the table.

2. Click on Groups from dataset1

3. Select a field from groups which are used in table

4. Click on the properties tab and select the advanced tab

5. Edit property “start New Page” change it to true.

Conclusion:


This is how you print each row of a table on a separate page in Jasper studio. Need expert advice? Get in touch with our team of specialists!

How to secure uploaded file over server using PHP

php server

How to secure uploaded file over server using PHP
Uploading a file (such as an image, zip, or PDF) is quite common in website development, and PHP makes the process very simple with the move_uploaded_file method. But hackers are always on the lookout for easy prey, such as .exe, PHP, and scripting files.

Although this does not guarantee that after this your code and server will be fully protected from hackers. but something is better than nothing.

Below are some tricks that you can use while writing code for file uploading –

PHP Server

Step 1:- Set File permission:

Before placing the file on the server, you may add non-executable permission to it. The server will be safe from executable and scripting files using this approach. You can use PHP’s chmod() function to change file permissions.


if(move_uploaded_file($_FILES[“uploadedfile”][“tmp_name”], $target_path)) {

         chmod($target_path, 0755);

     }else{

         echo “There was an error uploading the file, please try again!”;

     }


Step 2:- Use getimagesize method:

A very common trick used by hackers is changing the content type of a file to a valid one. To ensure that the uploaded file is a valid one or an image file, you can use the getimagesize() method.

$imageinfo = getimagesize($_FILES[“uploadfile”][“tmp_name”]);

     if($imageinfo[“mime”] != “image/gif” && $imageinfo[“mime”] != “image/jpeg” && isset($imageinfo))

     {

         // invalid file

     }


Step 3:- Create an upload folder outside of root:

The best way to avoid users from requesting uploaded files straight away is to keep the file in a folder outside the root. However, the major disadvantage with this method is that after this server will be unable to access the file.


Step 4:- Use .htaccess file:

You can set permission and prevent hackers to access files by making changes in the .htaccess file, If somehow hackers upload a file this will prevent executing a file.

Step 5:- The Include Function:

Sometimes you need to obtain input from the user in order to determine which file should be included in the PHP script. For example, suppose your site is called Site_languageuage.

if(isset($_COOKIE[‘Site_language’])){      

     $Site_language = $_COOKIE[‘Site_language’];

} elseif (isset($_GET[‘Site_language’])) {

     $Site_language = $_GET[‘Site_language’];

} elseif (isset($_GET[‘Site_language’])) {

     $Site_language = $_GET[‘Site_language’];

} else {

     $Site_language = ‘english’;

}

$siteLanguagePath = “Language/”.$Site_language;

include($siteLanguagePath);

Now there is no security for the input of site_language, An hacker can take benefit of this and enter the path of the file that he wants to execute.

As a result, to guarantee that hackers do not upload any harmful files to the system, you must secure your input/upload feature.

Step 6:- Rename file with an auto-generated name:

While uploading to the server, it is a good idea to change the file’s name. Hackers would find it difficult to figure out the name of the file and then hack or download it from the server.

It’s possible to encrypt and decrypt files using a variety of methods, including md5, for example. Alternatively, you might use self-encryption to encrypt and decrypt file names.

Step 7:- Restrict upload file size by html or PHP code:

You may secure your system by restricting or limiting the file size that can be uploaded. It will prevent users from uploading a huge file that would exceed the limit and cause problems to your system.

You can make these changes by using html as well as PHP script

Html:

<input type=’hidden’ name=’MAX_FILE_SIZE’ value=’100000′ />

PHP:

$max_file_size = 100000000;  

if(!$file_size || $file_size > $max_file_size) {

     echo “File size is more than maximum size limit”;

}


Step 8:- Verify session authentication:

After successful authentication, you may also check session authentication and enable file upload functionality.

or

You can also add a captcha to provide security against automated scripts. There are still several techniques available to us to safeguard your server from hackers and prevent them from uploading harmful material –


– Check the mime type

– Use an anti-virus

– Use a combined protection

– Use a different subdomain for uploading purpose

Each day new techniques are discovered to stop hackers from such work so keeping you update is best practice to keep your data secure.

Conclusion

In website development, uploading a file (such as an image, zip, or PDF) is quite common, and PHP makes the procedure straightforward with the move_uploaded_file method. However, hackers are always looking for easy prey such as .exe, PHP, and script files. We hope that this blog helped you in some manner. Keeping up with the latest methods to defend yourself from such jobs is essential in order to keep your data secure.

Need expert solutions for your online project? Get in touch with our team of specialists today!

Marshalling and Unmarshalling Java Objects using JAXB

Marshalling and Unmarshalling Java Objects

Java API for XML Binding (JAXB) is an acronym that stands for Java Architecture for XML Binding. Marshalling and Unmarshalling Java Objects are used both on the client and server side. It enables you to write Java objects into XML and read them back as objects. Simply said, it allows you to convert Java objects into XML and vice-versa.

Marshalling and Unmarshalling Java Objects using JAXB

JAXB was designed to simplify the process of connecting Java programs with XML data and processing functions. JAXB makes it simple for Java developers to include XML data and processing operations in their applications by allowing them to bind XML schemas to Java representations. In this article, we are providing complete information about Marshalling and Unmarshalling Java Objects using JAXB.

Unmarshalling (reading) XML instance documents into Java content is handled by JAXB, before marshaling (writing) Java content back into XML instance documents.  It also enables you to create XML schemas from Java objects.

JAXB – Marshalling/UnMarshaling (Convert Object <—> XML)

JAXB:

Java for XML Binding, Use annotation pattern to convert java objects to or from XML. Here the two terms mostly used are Marshaling and Unmarshaling.

Marshaling:

By using a java object, create an xml file or convert a java object to xml.

UnMarshaling:

Create a java object again using an xml file.

Prerequisites:

  • JDK 1.6
  • JAXB 2

Note: If using jdk version less than 1.6, download JAXB from http://jaxb.java.net/, and copy “jaxb-api.jar” and “jaxb-impl.jar” and paste to your classpath. No extra jaxb libraries are required if you are using JDK1.6 or above because it is bundled with jdk

JAXB Annotation:

JAXB Annotation

To convert things to/from XML using JAXB, use the Annotation pattern. We can apply a number of predefined annotation styles to our Java objects. This annotation does not participate directly in the xml creation; rather, it supplies information about xml schema. It has various properties like factoryClass, method, name, namespace, propOrder, and so on.

Below are some commonly used attributes –

name – Provides name to XML schema if you don’t want to use the class name

namespace – Provides the name of the target namespace (if you are using a reference object of some other class)

propOrder – Used to establish an ordering of the sub-elements

@XmlRootElement(name="TestDoc" )
@XmlType(propOrder = { "name", "stream", "class"})
public class TestingDocument
{
	String name;
	int class;
	String stream;
	
	public String getName() {
		return name;
	}
 
	@XmlElement
	public void setName(String name) {
		this.name = name;
	}
 
	public int getAge() {
		return age;
	}
 
	@XmlElement
	public void setAge(int age) {
		this.age = age;
	}
 
	public String getStream() {
		return stream;
	}
 
	@XmlElement(name = "subject")
	public void setStream(String stream) {
		this.stream = stream;
	}	
}
According to TestingDocument class order of properties is name > class > stream but as we have defined new ordering in @XmlType annotation so it will produce output xml like –
<?xml version="1.0" encoding="UTF-8" standalone="yes"?>
<TestDoc>
    <age></age>
    <subject></subject>
    <name></name>
</TestDoc>

The basic annotation for a field that’s intended to be an element is XmlElement. It permits you to define the XML element name and namespace.

In the above example, the property stream is renamed by subject using the name property of the XMLElement annotation.

  • @XmlRootElement (name = “root”) :

    Top-level element class, Define root element of XML document. Its optional elements are name and namespace. By default, we used the class name as the name.

    @XmlRootElement(name="TestDoc" )
    public class TestingDocument
    {
    }
    After Marshaling of this java class, It will produced out put xml like –
    <?xml version="1.0" encoding="UTF-8"?><TestDoc>
    </TestDoc>
  • @XmlType(propOrder = { “field2”, “field1”,”field3″….}) :
  • @XmlElement(name = “test”)

Here is one more condition that I would like to explain here. Sometimes you need to define property with xml tab like in below xml property subjectType in subject tag-


<?xml version="1.0" encoding="UTF-8" standalone="yes"?>
<TestDoc>
    <age>25</age>
    <subject subjectType="Math" >Science</subject>
    <name>testinguser</name>
</TestDoc>

To handle this type of condition, we need to create one more java class that will be used to set have property subjectType and its value, In our example we create a subject class like –


public class Subject {
	@XmlValue
	private String Subject;
	@XmlAttribute(name = "subjectType", required = true)
	private String subjectType;
			
	public String getSubject() {
		return StandardPrice;
	}	
	
	public void setSubject(String value) {
		StandardPrice = value;
	}

	public void setSubjectType(String currency) {
		this.currency = currency;
	}	
	
	public String getSubjectType() {
		return currency;
	}			
}

And Testing Documents set stream() method now set the object reference of subject class


@XmlRootElement(name="TestDoc" )
@XmlType(propOrder = { "name", "stream", "class"})
public class TestingDocument
{
	String name;
	int class;
	Subject stream;
	
	public String getName() {
		return name;
	}
 
	@XmlElement
	public void setName(String name) {
		this.name = name;
	}
 
	public int getAge() {
		return age;
	}
 
	@XmlElement
	public void setAge(int age) {
		this.age = age;
	}
 
	public Subject getStream() {
		return stream;
	}
 
	@XmlElement(name = "subject")
	public void setStream(Subject stream) {
		this.stream = stream;
	}	
}

In the above code we used @XmlValue to denote that this is used to add a property value, not a new xml tag. If we do not define this, then it will produce one extra <subject> tag within a main <subject> tag. @XmlAttribute(name = “subjectType”, required = true) here we are defining that property name as subjectType and it is a required field. Method getSubjectType() will return the value of subjectType property and getSubject() method will return the value of the subject tag in XML.

If you want to wrap multiple tags within a parent tag for example –

<?xml version="1.0" encoding="UTF-8" standalone="yes"?>
<students>
    <student></student>
	<student></student>
	<student></student>
</students>
To implement this type of condition, create class student and students and in students class, create a property having ArrayList of type student class.

JAXB marshalling example:

package com.tst.javaxb;
 
import java.io.File;
import javax.xml.bind.JAXBContext;
import javax.xml.bind.JAXBException;
import javax.xml.bind.Marshaller;
 
public class TestingDocumentExample {
	public static void main(String[] args) {
 
	  TestingDocument testDoc = new TestingDocument();
	  testDoc.setName("testuser");
	  testDoc.setAge(25);
	  Subject sub = new Subject();
	  sub.setSubject("Science");
	  sub.setSubjectType("Meth");
	  testDoc.setStream(sub);
 
	  try { 
		File file = new File("C:\\file.xml");
		JAXBContext jaxbContext = JAXBContext.newInstance(TestingDocument.class);
		Marshaller jaxbMarshaller = jaxbContext.createMarshaller();
 
		// output pretty printed
		jaxbMarshaller.setProperty(Marshaller.JAXB_FORMATTED_OUTPUT, true);
 
		jaxbMarshaller.marshal(testDoc, file);
		//to show out put in console
		jaxbMarshaller.marshal(testDoc, System.out);
 
	      } catch (JAXBException e) {
		e.printStackTrace();
	      }
	}
}

JAXB unmarshalling example:

package com.tst.javaxb;
 
import java.io.File;
import javax.xml.bind.JAXBContext;
import javax.xml.bind.JAXBException;
import javax.xml.bind.Marshaller;
 
public class TestingDocumentExampleUnMarshal {
	public static void main(String[] args) {
	 try {
		File file = new File("C:\\file.xml");
		JAXBContext jaxbContext = JAXBContext.newInstance(TestingDocument.class);
 
		Unmarshaller jaxbUnmarshaller = jaxbContext.createUnmarshaller();
		TestingDocument tstDoc = (TestingDocument) jaxbUnmarshaller.unmarshal(file);
		System.out.println(tstDoc);
	  } catch (JAXBException e) {
		e.printStackTrace();
	  }
     }
}

References:

Conclusion

We hope this tutorial helped you in some manner. You can share your thoughts in the comments down below. Need expert advice? Meet our team of specialists today!